Planting Bay Laurel
Laurel is hardy down to a temperature of about 10°F (-12°C). You can grow it perennially outdoors in USDA hardiness zones 8 through 11. It prefers sun to partial shade and rich, loamy soil with excellent drainage. In hotter regions, some protection from harsh midday sun is ideal.
It is not recommended to grow a Laurel plant from seed because they have very low germination rates. Instead, obtain a nursery plant or a rooted hardwood cutting from someone who has a mature bush. Space plants 15 feet apart, or 8 feet apart if you’d like them to hedge.
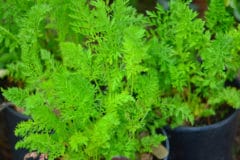
In cooler climates plant Laurel as a container plant and bring it inside during the winter. Prepare a container plenty deep and wide enough to comfortably fit the root ball of your laurel plant.
Make sure it has large, well-placed drainage holes. Fill it halfway with a fast draining potting mix, or in deeper containers put 2-3 inches of gravel in the bottom and then fill to the halfway point with all-purpose potting soil.
Place the plant roots in the pot and fill them to the top. Leave a 1-inch rim at the top to hold in moisture and allow for expansion. Press the soil down with your hand around the root ball to get rid of potential air pockets.
Here is a quick planting checklist for Bay Laurel:
- Hardy to 10°F (-12°C) Zones 8 and up
- Full sun to partial shade
- Well draining, loamy soil with pH between 4.5-8.3
- Plant in container in cooler areas
Laurel Care
Laurel plants can reach heights of 60 feet if left unpruned. Twice a year prune your laurel plants back to the desired height and shape. As a hedge plant or yard ornamental, you may want it to grow 15-20 feet. If in a container, 5-6 feet is about the maximum for portability. These are topiaries and can be pruned into any desired whimsical shape.
August and April are the best months to prune laurel. Once in the fall to control summer growth and again in the spring to remove winter damage.
During spring prunings, rake back the mulch around the base of plants. Top off the soil with 2-3 inches of fresh finished compost or worm castings and then replace the mulch. Alternatively, an organic fertilizer can be applied at this time. No other feedings are typically required.
If your plants are in a container, they will need regular re-potting. Plants like to maintain an equal volume of foliage both above and below the soil. If your plant is getting large, it may need to be placed in a larger pot. Increase the pot size by 2-3 inches each re-potting.
Harvest Bay Laurel leaves in mid to late summer for the best flavors. You can use the leaves cut off during your pruning as a spice. Typically the older the leaf is, the more developed and robust its flavor.
Pests and Disease
A number of diseases and pests can affect Bay Laurel. Some of the most common include:
- Phytophthora Rot
- Powdery Mildew
- Bay Anthracnose
- Bay Sucker
Phytophthora, Powdery Mildew, and Anthracnose are all fungal infections that can affect Bay Laurel. Phytophthora Rot and Anthracnose are similar in symptom and outcome. Black spots, curled and wilted leaves, cankers on the wood, swollen or sunken tissue are all signs of these infections.
Cut out any infected branches and foliage. Always trim to allow maximum airflow, particularly in moist climates. Applying additional mulch around the base of the tree will help prevent the spread of fungal spores. All you can do is mitigate these diseases and minimize the damage they cause. A diverse and healthy garden ecosystem will do a lot to reduce the presence of fungi like these, and minimize any disease issues.
The Bay Sucker is also called a jumping plant louse. This little mite overwinters under the bark of bay trees and emerges in the spring and feeds on the leaves causing yellowing and lost foliage. These pests won’t kill the tree but will make it susceptible to more threatening issues. Remove them by washing the undersides of the leaves with a mild soap solution.
