Choosing a variety
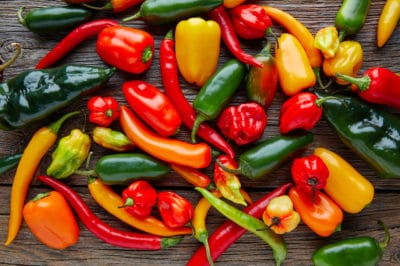
In USDA zones 7 and below where there are less than 90-100 days of frost-free weather, shorter season crops will do better than long-season peppers. In most cases, hot peppers tend to have longer growing seasons. Here are some great short season peppers.
Sweet peppers:
- Ace: This is an early-season sweet bell pepper. Fruits can be eaten green and mature to a bright red. 70 days to maturity. Great for grilling, stuffing, frying, and roasting.
- Lady Bell: Very dependable red bell pepper. 71 days to maturity. Tobacco Mosaic Virus Resistant. Great for fresh eating in salads and cooking.
- King of the North: This is another gree/red sweet bell pepper. Open pollinated and 61 days to maturity. Thick walled, excellent stuffing pepper.
Hot peppers:
- Early Jalapeno: Open pollinating and 80 days to maturity. Commonly used green but will ripen to red. This is a great short season jalapeno.
- Hungarian Hot Wax: 65 days to maturity. This is a medium hot pepper that turns from green to yellow and then red. They are six to seven inches long and tapered. 10,000 Scoville heat units.
- Anaheim: Varieties available in sweet, medium hot, and hot. 85 days to maturity. 7-inch long fruit mature from green to red. Good for fresh eating, frying, and pickling.
Planting from seed
In the tropics, peppers can be seeded any time of the year in a well-cultivated garden bed. Soil should be amended with three to six inches of compost worked in or added as a mulch. Keep the soil moist at all times but ensure that it is draining.
In cooler climates, it is recommended to start pepper early indoors. This practice allows gardeners to get the maximum harvest from their planting. Days to maturity refers to the time between transplant and fruiting. Once a pepper plant fruits, it will continue to produce. The earlier you can get a plant fruiting, the more you’ll be able to harvest.
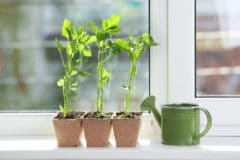
Start pepper seeds indoors or in a greenhouse 8-12 weeks before the first frost in your region. Use a high-quality potting soil or make your own using equal parts peat moss, perlite, and compost.
Peppers germinate at soil temperatures of 70°F (21°C). If you cannot keep a greenhouse at that temperature, use a heat mat beneath germination trays. Keep the soil moist at all times.
Caring for Seedlings
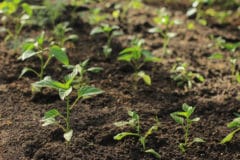
As soon as plant sprout indoors they should be moved beneath a fluorescent shop light. Hang the light two inches from the top of the plant and raise it up as the plants grow. You can purchase more expensive plant-specific lights but it isn’t necessary for starting seedlings.
Water with a liquid fertilizer once the first set of true leaves develops. A homemade compost tea with worm castings, manure, or finished compost is perfect. Otherwise, you can purchase organic liquid fertilizers at garden supply stores.
If seedlings are in trays or small starting pods, they will need to be transplanted before becoming rootbound. A plant always maintains the same biomass below the soil horizon as there is above the soil horizon. If your seedlings yellow or stop growing, it may be because they need to be transplanted. Select a container that is at least one-third larger than the one they came out of.
Tranplanting and Hardening Off
When soil temperatures outside reach 65°F (18°C) consistently, your plants can permanently go outside. This is usually around two weeks after the last frost date. Some people in cool climates prefer to keep peppers in a greenhouse or polytunnel year-round.
If they are going outside, they will first need to be hardened off. This is the process of slowly introducing direct sunlight, wind, and temperature fluctuations to a greenhouse-raised seedling. Over the course of a week, bring the seedlings outside and expose them to increasing levels of direct light and wind.
Let them feel the cool off that happens and night. They are ready to transplant when they can be outdoors in direct light and evening temperatures for 24 hours without wilting or showing signs of stress.
Seedlings transplanted directly into the ground may shrivel up beneath the sun, grow slowly, or stop growth altogether.
Caring for plants
One great rule to live by when growing peppers is if you are comfortable then they are too. This then leads to the flipside of if you are uncomfortable, they are too. Peppers can get too much sun and too much heat in the dead of summer. Despite being a tropical plant they are used to growing beneath larger canopy trees that prevent the harsh midday sun from reaching them.
Water daily through hot and dry periods. Check the soil moisture with a meter or by sticking your finger into the soil. If you feel moisture then they are probably okay. If it feels dry, give them a good soak. Water peppers deeply about once a week.
The garden soil should have fresh compost mixed into it which will act as a slow-release feed. Foliar sprays can also be beneficial for preventing disease, pest damage, and feeding pepper plants. Consider using a diluted compost tea, fish emulsion, seaweed or kelp mixture, or Epsom salt as a foliar spray-on feed.
Pruning and Staking
How you prune a pepper plant depends on how you prefer it to grow. Most pepper varieties are indeterminant, meaning they will grow very tall without any determinant height. You can create bushy habits in these varieties by topping them when they are young.
Topping
This pruning practice refers to pinching off upward growth above two healthy nodes where you want the plant to branch. Instead of growing tall and lanky, a topped plant will continue to branch at every pinched intersection.
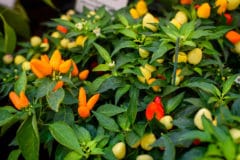
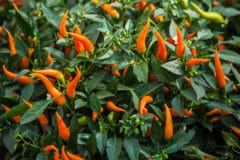
This is a popular technique for ornamental and small hot peppers. It creates a spectacular firework spray of pepper bush that is attractive and highly productive.
Staking
Plants may require some sort of support as they grow heavy with fruit. A simple stake to which you can tie the main pepper branch is probably all it needs. Other options include using a tomato cage to place around the growing plant. Or, if you’ve got a row you can build a row trellis to support multiple plants at a time.
Harvest
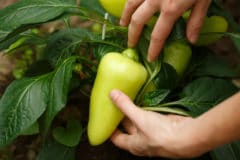
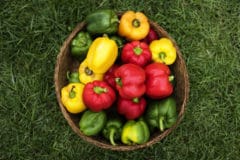
Harvest peppers at any time after they appear. Green bell peppers are just young red or yellow bell peppers, which is why they are often cheaper in the grocery store.
Peppers will reach a maximum size on the plant before beginning to ripen. Once they’ve reached maturity or full size, it will take a few days for the fruit to change to its final color. Usually, peppers are most flavorful at their brightest color.
Some varieties are preferable green. Jalapenos, for example, are almost always eaten green even though if allowed to mature to red, they become hotter and more flavorful.
Health and Disease
A biodiverse garden and healthy soil are the keys to growing healthy plants. Keep pests off your pepper plants by planting them amidst companions like garlic, onions, and aromatic herbs. These plants not only deter pests, they also attract beneficial predatory insects.
Some common diseases that affect pepper plants are:
- Mosaic Virus: Caused from contact with infected plant tissues. Symptoms include leaf yellowing and bubbling, brown sunken spots on fruit and foliage. Treatment is removal of infected plants. Some resistant varieties are available.
- Blossom End Rot: A calcium deficiency caused by too much nitrogen and inconsistent watering. Blossoms may rot or fall off prematurely, the ends of fruits may rot prematurely. Stick to a watering schedule and avoid nitrogen fertilizers.
- Powdery Mildew: A white fungus that colonizes foliage and fruits in wet and moist environments. Prune plants for better airflow and provide better sun. This doesn’t typically cause death.
Storage and Preservation
Store peppers in the fridge for up to 10 days after harvest. If you need to store them longer, consider preserving them in a number of ways.
Freeze peppers for later use in soups, stir-fries, sauces, and baked goods. Peppers can also be dried using a dehydrator or conventional oven. Hot peppers are particularly useful when dried and ground into chili powder or cayenne. Paprika is dried and ground sweet red bell pepper.
