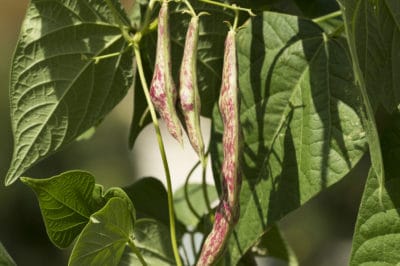
Types of Beans
At least 40,000 bean varieties are known in the world. Many are available in both bush and pole types. They include:
- Common beans, such as green or string beans, pintos and kidney beans
- Lima beans
- Runner beans
- Fava beans
- Soybeans
- Chickpeas
- Lentils
- Hyacinth beans
- Winged beans
- Yard long beans
- Pigeon beans
When to Plant Beans
Most beans should be planted about two weeks after the expected date of the last spring frost. However, fava beans tolerate cool weather and can be planted as early in spring as peas or lettuce. Favas are also planted in late fall as a cover crop. With their short maturity dates, many bush beans are also planted in early to mid summer.
Best Soil for Growing Beans
Although beans will produce their own nitrogen, they still need other nutrients such as potassium and phosphorus. Amend the soil with well-rotted leaf mold, organic compost or aged manure. Beans need plenty of water while growing – especially pole varieties with their large canopy of leaves – but soggy soil encourages disease. Soil should be well-drained.
Seed Germination
Many beans will germinate better if soaked overnight prior to planting. However, you can also dig a small trench in the soil, soak it well, plant the seeds and then water again. Soil temperature for all beans except favas should be at least 60°F (16°C). Bean seeds will generally germinate within a week, although cooler weather may delay germination slightly.
Spacing Bean Plants
Bush beans do well either in rows or when intensively planted. In the first case, space seeds about two or three inches apart in rows 18 inches apart. For intensive planting, space plants three to four inches apart in all directions. Pole beans should be planted four inches apart along a trellis or plant four to six beans at the base of each pole.
Pole Beans or Bush Beans
Some beans – like favas – only come in bush varieties. Others are available in both forms. Pole beans require a trellis, but bear for several months and generally produce more heavily than bush beans. However, bush beans may produce a crop in as little as eight weeks. Each type of bean has many different varieties, so you’ll have plenty of choices.
Thinning Beans
Unlike many other vegetables, beans have relatively large seeds. This makes it easy to plant with the proper spacing. It’s not that common to have to thin beans, but if you have over-planted, thin by cutting the seedling off just above the ground rather than pulling the plant out. If you have older seed and are unsure of germination rates, plant more thickly and thin if necessary.
Fertilizer for Beans
If your soil is in good condition, bean plants don’t usually need to be fertilized. They will produce their own nitrogen, which enriches the soil for following crops. In fact, adding fertilizer – especially nitrogen – can result in extensive leaf growth but not much in the way of flowers or pods. If you have very poor, sandy soil, however, you may need to use an organic 5-10-10 fertilizer.
How to Water Beans
Beans need adequate water for proper development. Most are not very drought tolerant, although tepary beans do well in desert conditions. Deep watering is best, with a minimum of one inch of water a week. Soaker hoses and drip irrigation keep water off the leaves. If you use a sprinkler, let the plants dry completely before working with them to prevent the spread of disease.
Harvesting Beans
When you harvest beans depends on how you want to use them. For green or string beans, pick when pods have just begun to swell and the beans are three or four inches long. For shell beans like limas, harvest when the seeds have swollen and the pod looks lumpy – usually about two weeks after the green bean stage. Dry beans can remain on the plants until frost threatens.
Seed Saving
One reason there are so many kinds of beans is that it’s very easy to save seeds. Beans are an annual and are also self-pollinating. Saving seeds is pretty much a matter of just letting the plants grow until the bean pods are fully mature. Harvest before frost or winter rains start and let the seeds dry completely, then remove the seeds from the dried pods.
